Don’t worry about not having enough space, as you can have a vegetable garden even on your deck or balcony. Let us show you how easy it can be…
Growing edibles is one of the hottest gardening trends, and it is slowly becoming a necessity. Vegetable gardens are the easiest and cheapest way to have your own healthy, safe veggies. You have probably thought about starting your own vegetable garden, and we encourage you to go for it.
It is such a rewarding project as you will enjoy your first harvest in a very short time. Of course, there are things to know before starting or even planning your vegetable garden. Many tips will help you throughout the whole process.
This is why we decided to cover the basics of creating a successful vegetable garden. The article covers the most important aspects of gardening like choosing the right vegetables, planning and designing your garden’s layout, soil preparation, planting, and harvesting. We hope you will find our tips useful and manage to grow your own healthy and safe edibles.

1. Choosing Which Edible to Grow
If you are a beginner in vegetable gardening, it is best to choose edibles that are easy to grow. Some of the best choices are lettuce, tomato, sugar snap peas, beans, radish, summer squash, rhubarb, chives, basil, thyme, etc. But, we advise you to start small. This means planting just as much as you need. You don’t want to end up wasting food and feeling overwhelmed by your garden.
Think about what your family eats. Also, keep in mind that some veggies keep providing throughout the whole season while others produce only once. Planning is the key to a successful vegetable garden.
2. Use Your Space Efficiently
Ok, so you have chosen what to plant. Now it is time to determine how much space you need and, of course, to choose the perfect location for your vegetable garden. It should have enough sunlight to be near a water source and be protected from wind and frost. When you have chosen the perfect location, you should decide how to make the most of the space you have. Again, go small; you don’t need much space, to begin with.
In fact, you can successfully grow edibles in containers on your deck or balcony, so obviously, you don’t need too much space. If you tend your garden well, it will produce more than a much bigger weed-filled garden. It is simple – a large garden requires much more time to be maintained. If you are an experienced gardener and have enough time to take care of a large garden, we encourage you to go for it. But if you are too busy to spend a lot of time in your garden or are a beginner, we recommend a smaller edible garden or even raised beds as a much better choice.
3. Design and Layout

photo via howgarden.com
There are two ways to plant the layout of your garden. The first is traditional row planting, which is the most common vegetable garden layout. You place plants single file in rows, with a walking path between each row. Although row cropping sounds logical and easy, this approach is suitable for large vegetable gardens only. And with the fact that we have less and less garden space, a different approach is more suitable.
Intensive cropping reduces the space needed for a vegetable garden. It involves using wide bands. By dividing the garden into small beds will allow you to mix different kinds of vegetables even if your garden is small. In both cases, raised beds or open beds, you will actually be able to downsize the garden. There are many reasons for choosing an intensive garden system over rows. It requires less effort, less soil complication, etc.
4. Move The Crops
We recommend using the three-year crop rotation system, which means planting the same crop in the same place only once every three years. This way, you ensure that the same garden vegetables will not deplete the same nutrients year after year and help foil any insect pests or disease pathogens that might be lurking in the soil after the crop is harvested. To implement this system, you will need to make a plan. It will show all plants’ locations during each growing season so that you know exactly what you were growing and where.
5. Prepare the Soil
If your garden hasn’t been planted before, your vegetables will do great the first year. However, in the next one, you will have to prepare the soil for good results. Add some good organic matter to the soil. It is always best to test the soil before planting your edibles. Determine the pH of the soil by using a soil test kit.
Acidic soils or soils with low pH can be sweetened by adding lime. In contrast, alkaline soils with high pH need gardener’s sulphur and rich organic matter and should be mulched with acidic materials such as pine needles and forest duff. Don’t forget to check soil drainage as well. You can do this by soaking the soil with a hose, waiting a day, then digging up a handful of soil. Squeeze the soil hard. If water streams out, you’ll probably want to add compost or organic matter to improve the drainage.
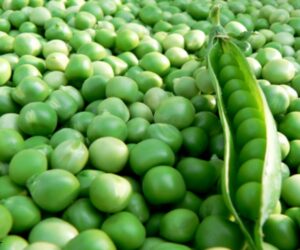
6. Starting Seeds Indoors

photo via activelivingzoomers.com
Grow your own seedlings indoors in late winter so they are ready to be planted when the weather is warm enough. This goes for veggies like tomatoes, peppers, and eggplant that need a warm growing season to produce a harvest. You can also start cool-season crops, such as broccoli and cabbage indoors so they will be ready to transplant into the garden in early spring or fall.
To start the seeds, fill 4-inch containers with a potting mix. Moister it and let it dry, then plant the seed according to the package instructions. Moist the soil lightly, and don’t forget to put a label with the plant’s name. When the seeds germinate, move the pots into an area with bright light and temperatures between 60°F and 75°F. Transplant to individual pots when their second set of true leaves develops. Water immediately, and then set the pots in bright light. Use fertilizer sold for starting seeds to feed your seedlings every week.
7. Planting Warm-Season Crops
Traditional summer crops such as snap beans, corn, cucumbers, melons, peppers, tomatoes, and squash should be planted after the last frost in spring. If you plant them early, make sure you give them proper protection. As their name says, these veggies, like warm soil and high temperature, will be killed by winter frosts. With warm-season crops, the fruit is usually the edible part instead of their leaves or roots, and they can be stored for winter consumption. Other warm-season crops are edamame, eggplant, okra, zucchini, watermelon, herbs, etc.
8. Planting Cold-Season Crops
Cold-season crops or winter vegetables prefer a cooler climate and grow best at temperatures averaging 15° cooler than those needed by warm-season types. Usually, they have edible roots and leaves, while a few produce edible seeds. These veggies should be grown to maturity in cool weather. You can plant them in early spring or late summer. Cool-season vegetables include beets, broccoli, Brussels sprouts, cabbage, carrots, cauliflower, celery, kale, lettuce, onions, peas, potatoes, radishes, spinach, and many more. Most of them can tolerate short periods of frost.
9. Taking Care of Your Edible Garden
When your vegetable garden is all done, the real work starts, taking proper care of it. The most important part of maintaining your veggie garden is watering. Provide about an inch of water per week or less if there is enough rain. There is a rule that will help you – always check the top inch of the soil. If it is dry, then you should water your garden.
Raised beds need more watering than in-ground crops. Water them every other day. Weeding is another important aspect. Ensure you keep them to a minimum by stirring the top inch of soil regularly to discourage their seedlings. With larger plants, mulch, plastic, and compost can help with weeds. As we already mentioned adding fertilizer is necessary for a rich harvest. Use high-quality compost or packaged vegetable fertilizer. Don’t overdo it, as too much fertilizer can hurt your crop.
10. Harvesting is what it’s all about

If you have planned, planted, and maintained your vegetable garden as needed, you can expect a successful harvest. Harvesting is done in several stages, depending on the vegetable variety. It is best to take a basket and collect everything that is ripened daily. On-time harvesting will make your veggies produce more. Some vegetables are better to be harvested while they are still small.
Zucchini is an example – when they are longer than 7 inches, they become tough and woody. As we said, planning is everything when vegetable gardens are in question, so keep track of what you have planted and follow the package instructions. Check the seed packet to know what to expect of each crop. Harvesting is also the perfect time to look for diseases or pests so you can get rid of them.

hello my name is Marieme for two years now I am dying to have my own garden,I need help badly I am not around in the summer time as I go back to my home country with my children.I want to garden so I can feed my family healthier my husband and my two youngest 9 and 13 have type 1 diabetes,I live in Long Island New York I really will appreciate it if someone from your team can guide me through a start.Thank you
Hi, Marieme, I’m not with this site, I was looking for any useful gardening tips. But, anyways, try your local ag extension office. They can be a beginner/small farmers best asset when it comes to getting started. They usually have a great team of people that can help guide you through the whole process, from what will grow best for your area, help you with testing your soil, when to harvest your crop and the best ways to put up what you harvest. A lot of people don’t realize that their ag extension office is there for small farmers, also, not just the big time cash crop farmers. They may even also offer some gardening classes for beginners. I hope this helps you out.
Fix the typos and sentence structures for an easier read. Hard to follow and gave up half way through.