Many people think that re-potting a plant can be a very difficult task. They are afraid that the plant will die if they don’t do it correctly or that they will damage the plant by removing it incorrectly from the old pot. It can actually be quite simple, but you have to know some tips.
Read on to get more information on how to do it properly and try it yourself.
1. When to do it

The first step is to recognize when to repot your plant. The best time can be in late winter since the plants are getting ready to begin their spring growth or during the spring and summer when they’re actively growing. You should also do it if it looks like the plant will burst out of its pot.
2. Supplies

You should use porous material to cover the drainage holes in your new pot. A trowel can be helpful when trying to remove the plant. Gardening gloves will keep the dirt from getting under your nails. Scissors or a sharp knife will help cut off excess roots and, most important thing, a bigger pot.
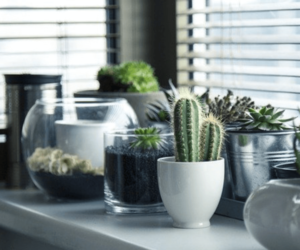
3. Choose a new pot.

Via magnoliagardencom.fatcow.com
The new pot should be slightly larger than the current one—about 1 to 2 inches in diameter and 1 to 2 inches deeper. If you choose a too big pot, the roots will need to grow into the pot first before the plant itself can begin to grow. If you choose terra cotta pot, soak it before planting .
4. Drainage holes

Via www.amazon.ca
The pot needs to have drainage holes that will allow excess water to drain. This will prevent roots from rotting. Cover the drainage holes to make sure soil can’t escape through them. You have to use something that will allow water to pass through, like a paper towel or a coffee filter.
5. Remove the plant

Via www.youtube.com
Slip your hand over the top of the pot, holding the plant’s stem between your fingers, and turn the pot upside down. Rotate the plant a few inches in both directions to loosen it up and allow it to fall out. You also may have to run a knife blade around the inside of the pot’s rim.
6. Prune the rootball

Via www.youtube.com
Pruning the old roots will help the plant thrive better after the re-potting. Remove the ones that are growing out of the core rootball. Also, cut off all roots that appear rotten, dead, or damaged. Untangle healthy ones so they will grow outward instead of internally.
7. Watering

A day or two before you plan to repot the plant, water it thoroughly. This will help your plant to stay healthy, and it keeps the rootball together. It is also easier to report if the growing mix is moist. You should also water the plant after the re-potting
8. Soil

You will need more soil when re-potting. It is recommended to add extra nutrients to the soil. It will help your plant thrive better. If the mix is too dry, add more water. Before you place the new plant inside the pot, put a base layer of soil so the roots will have some space to grow.
9. Clean the pot

Clean and disinfect the pot you are planning to use if you will reuse an old one. They can accumulate minerals or other debris that can be harmful to the new plant. Soak it for ten minutes or more in a solution containing one part bleach and nine parts water. Then clean it with dish detergent and rinse.
10. After repoting

Via www.youtube.com
Use your fingers to press down the soil. Not too hard, though, just enough to eliminate any large air pockets without compressing the soil. Newly re-potted plants should be kept away from full sunlight for at least a week. Wait about a month before you start fertilizing again.