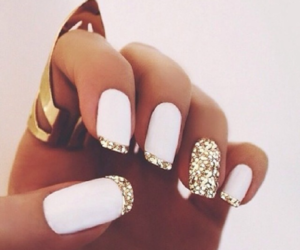
Perfectly painted nails and fashionable nail colors can express your mood, match your outfit and reflect your personality.
Now, there are so many amazing colors to choose from…classic red, simple beige, vampire black, or mysterious purple. With all this excitement, it’s easy to forget that sometimes painting your own nails at home, can be tricky. You don’t have to go to the salon and spend a lot of money on manicures, you can easily paint your nails like a professional at your own home. Read this article and find out how to achieve beautifully polished nails! With these smart rules, you’ll never need a professional manicure again!
Never Shake Your Nail Polish

Tutorial via cosmopolitan.com
First things first, shaking your nail polish can lead to chipping. This happens when tiny air pockets get created inside the bottle precisely by shaking. Has it ever happened while applying your nail polish to get air bubbles that left holes in your manicure? Well, that is because either you give it a few shakes before painting your nails or your nail polish wasn’t stored properly. If at times you see your varnish bottle split its color, instead of shaking it, give it a few rollings between your hands.
Stay Away From Quick-Dry Nail Polish

Tutorial via allure.com
The reason why you should try avoiding quick-dry nail polishes is that they dry the natural nail too. Although they take less of your time, they might not be the best choice at first. This also applies to acetone too. Use nail polish remover that has no acetone, or else might cause your nails to crack, chip, peel, and break. So, better to spend a long time waiting for your polish to dry than damaging your natural nails.
Keep Your Paint In A Cool, Dry, Dark Place Like Your Fridge

Tutorial via cosmopolitan.com
The humidity from the bathroom, the direct sunlight, and a hotter room temperature will make the oils collect on top of the nail polish layer. Storing your nail polishes in the right place with the right temperature also slows down the discoloration of the product itself. If you have a room that is cooler and has a darker spot try storing them there, if not your fridge can be the best place. It is also important to keep the nail polish standing upright.
Follow This Diagram To Imitate How Professional Manicurists Apply Nail Polish

Tutorial via buzzfeed.com
As showcased in the photo, there are a few steps to follow when applying nail polish. Starting off with clean nails and a base coat, then carefully apply the nail polish using three strokes. You can apply a second coat of varnish in case the color did not sit well and you can see the brush lines, or the color paint is too light and need another coat to pop better. Finish with a top coat to keep the paint last longer and have a shinier finish.
Three Strokes Are All You Need

Tutorial via thebeautyholic.com
The three strokes method is actually when you are applying paint using the brush three times only. Starting from the middle and center of your nail, following with the sides. Of course, if the brush lines can be seen on the nails after the first coat, you can repeat the same method one more time. However, when using darker shades of varnish the three strokes method works great. Try paying extra attention when bushing towards the cuticles, leave a very thin gap when applying the polish.
Apply Thin, Not Thick Coats Of Polish

Tutorial via lorealparisusa.com
When you are doing a home manicure, it is not easy to keep the coatings thin and the same on each nail. This gets especially harder when you are applying on the opposite writing hand (so better start with the more difficult apply, while you still have patience left). One way to apply thinner coating is not to scup a lot of polish on the brush, but just enough to apply on one nail. The thicker the coating is, the quicker the polish might peel. If the nail polish started having thicker consistency, make it thinner by adding a few drops of acetone to the bottle.
Erase Mistakes By Dipping A Tiny Brush Into Nail Polish Remover

Tutorial via buzzfeed.com
There is almost no way to apply nail polish without mistakes like painting the cuticles and the skin around the nails, especially on the opposite writing hand. A clean and neat manicure is a dream of every woman. And while these mistakes happen, have in hand a tiny brush that you can dip in acetone to erase the unwanted polish from the areas that disturbs the overall look. If it’s happening often to you, we recommend using liquid latex to skip this process and to protect the skin around the nails.
Swipe On Cuticle Oil Religiously

Tutorial via byrdie.com
A step that should not be skipped at all. Even if you don’t do your manicure that often, or using hard gel, applying cuticle oil every day is not harmful. The oil helps the nail grow, smoothens the cuticles, protects the nails, and increases the circulation around the nails. Apply after each manicure or can be part of your daily routine. Once applied massage the skin around your nails for at least a minute. The results are fantastic.
Always Use Primer, Base, And Top Coat

Tutorial via meanail.com
Absolutely important! Prepping your nails before a manicure is essential. Starting with the primer, especially for a gel manicure; it removes the remaining oils and grease of the nail plate. Next, apply the base coat. The base coat protects the natural nail from breaking, peeling, and discoloring (nails can turn yellow from dark varnishes). And finally, the top coat boosts shine and adds protection. Each one of them plays an important role in your nails.
Hold Your Hands Under Cold Water-Post-Paint Job

Tutorial via cosmopolitan.com
To speed the drying process of the nail polish, hold your hands under cold water. Once you finished painting them, wait for a few minutes to let the polish set and then hold them underwater. A sure sign that your nail polish has completely dried, is when you can see the water beading on top of your nail surface. A quick and easy post-paint job!